
[How To] Build a Customer Support Tool on DronaHQ
This article walks us through the process of creating a customer support tool on DronaHQ by integrating with customer database, CRM, support ticket management system, email services, and refund management system.
Whether you are a customer success manager, sales head, or a product manager, you will find your team spending time over manual tasks that could be simplified had there been a customer integrated tool that connects the CRM to ticket management system to payment and refund system.
There are huge disconnects between day to day sales and customer support tools – Stripe, Shopify, Database, Email records, Notes and so on. This results in delays, loss of productivity, and poor analytics.
In this article we go over the process of building a custom internal tool for customer support teams.
This tool fills the gaps between the CRM database hosted in MongoDB, the Ticket management system Zendesk, the Payment management system Stripe.
Creating a way for you to view and manage all customer support interactions. This tool streamlines client communication by providing a unified interface to support teams to communicate. No more messy email threads and calls. Acting as a proper customer data management tool, The customer should not have to repeatedly share their details when interacting with the support team. The information has already been updated by the customer where they can keep updating it and the internal tool simply needs to reflect the most recent/updated information.
With a huge assortment of pre-built connectors and ability to register APIs, DronaHQ easily fills in all the gaps in your customer support portals. DronaHQ allows you to easily connect with external APIs and databases as well, streamlining your internal apps to make your workflow simpler.
This is part 1 of a three part tutorial.
Part 1: Integrating with Zendesk and MongoDB
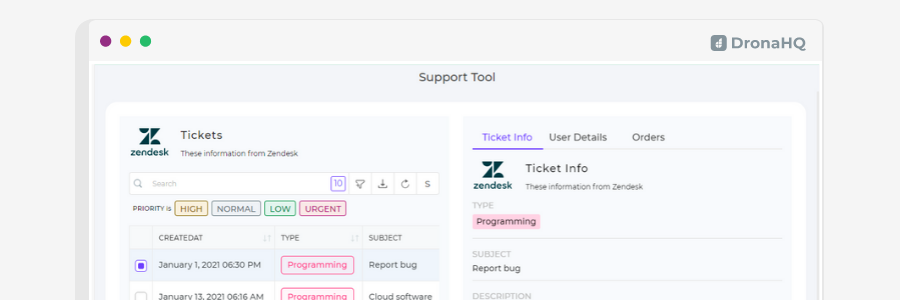
Zendesk is a ticket management system used by customer success teams to track, prioritize and solve customer tickets. When you integrate a feature-rich internal tool built on DronaHQ with your Zendesk app, you get a real-time, custom dashboard for customer facing teams to scan through user tickets. This dashboard becomes more powerful with integration to the customer database, in this case, MongoDB, as the CS rep can instantly get all the necessary information about the customer on a single screen without manually having to search for it or repeatedly asking the customer to share the details.
DronaHQ – MongoDB Integration
For this example, you need to be signed in to your DronaHQ Studio accounts.
If you haven’t signed up, join by using this link to follow along with the process – > Free DronaHQ Signup
1. Adding the MongoDB integration on DronaHQ
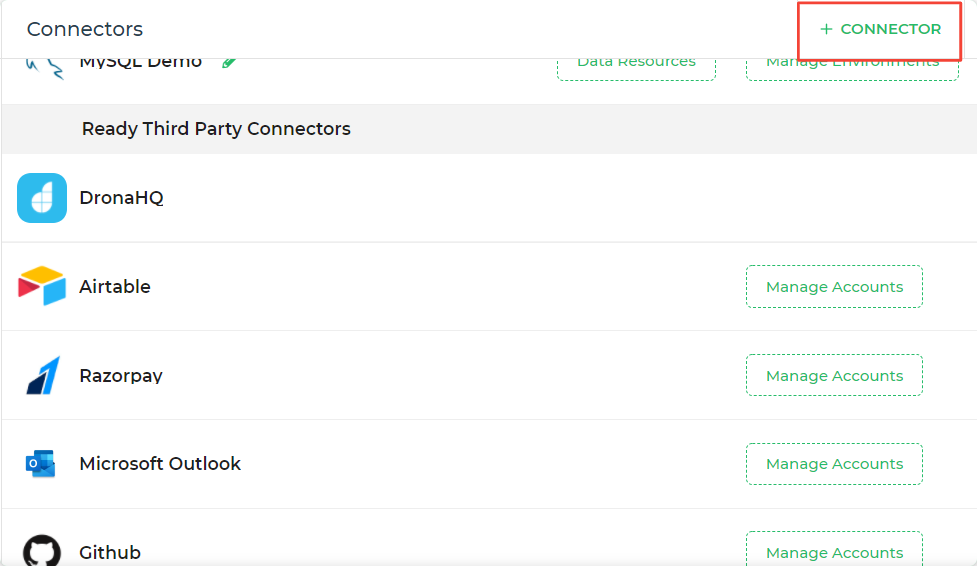
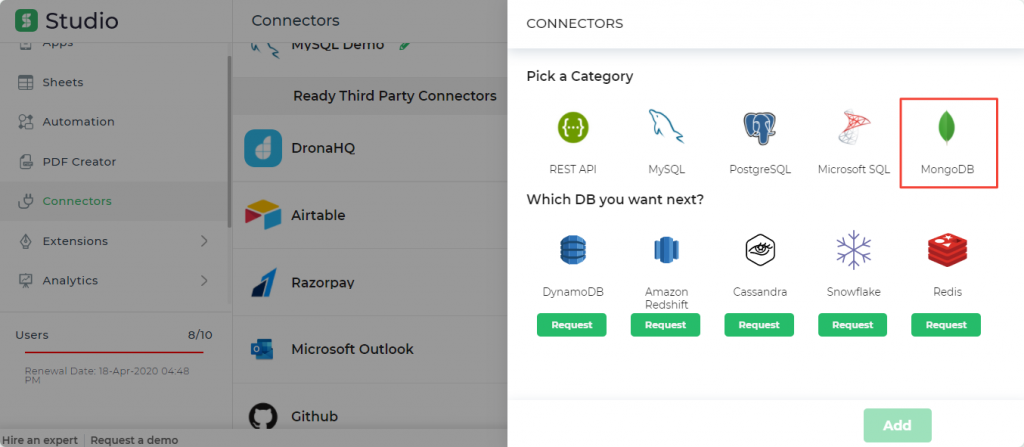
First, head over to the panel menu on the left and click on “ + Connectors”. A list of connectors will pop up. Under the connectors menu, and then select “ MongoDB“.
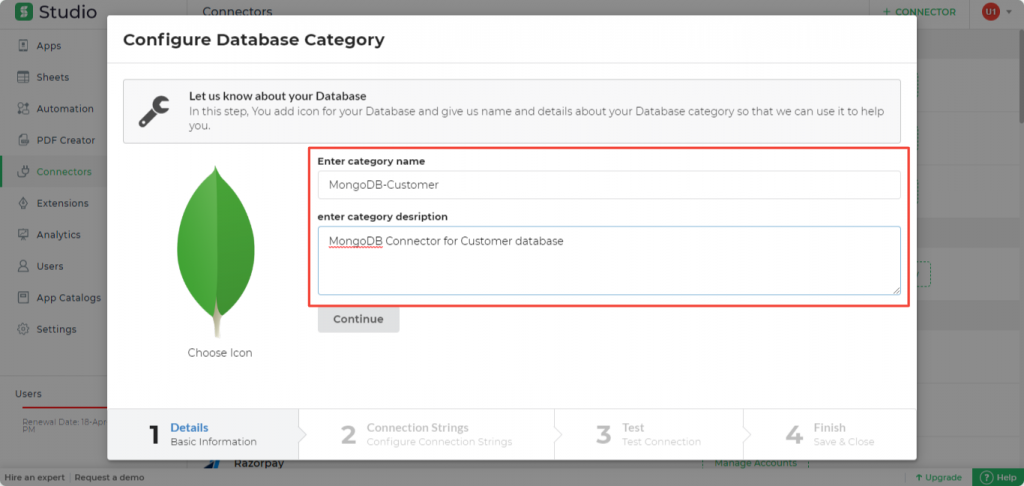
Step 1: Entering Basic Details for the Database Connector
Enter a name for the connector that you would like to use. This will be used to refer to the connector while you are building the app.
After you are done adding a name and description for the connector (I chose to write the purpose of this connector as my description), click on “Continue”.
Step 2: Adding the Connection String from MongoDB
Under the Connection Strings Section, click on “Continue”. It will prompt you to “Test your Connection”. Click on “Test”. You will be asked to select the “Environment” in which the Connector should be available in. You can choose between Dev, Beta, and Prod.
I will select Prod as I will need the connector to work in the live app that the customer support team will use.
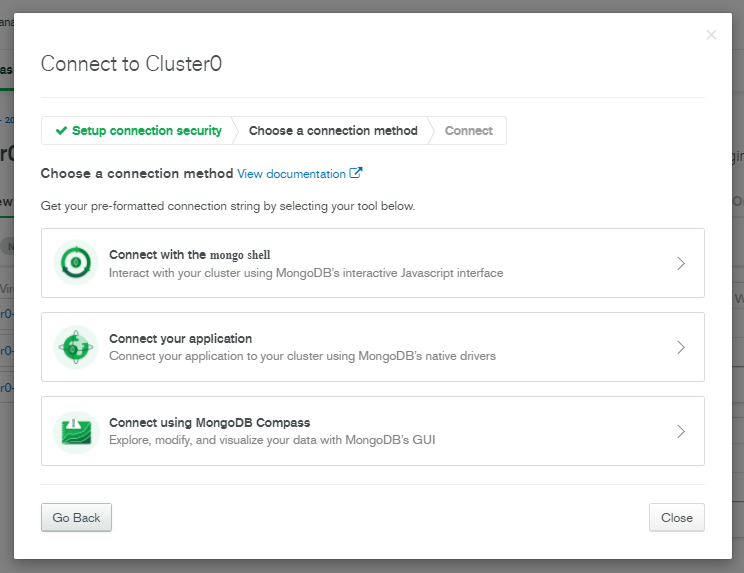
To get the Connection String, head back to your MongoDB database. In my app, I am using MongoDB Atlas. Head over to Clusters > then click on Connect

Step 3: Configuring the Database and Testing
Click on Connect your Application to get the Configuration link in the next step.
Here is the process by MongoDB on how to get the configuration link and how to use it in your apps: https://docs.mongodb.com/guides/cloud/connectionstring/
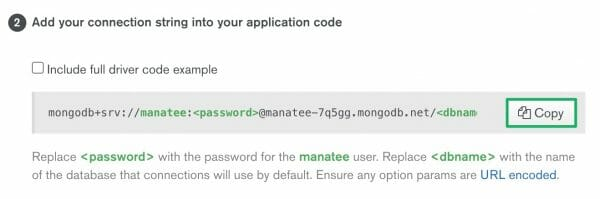
Head back to DronaHQ and enter the copied link into the box. The subsequent field will auto-populate. Click on “Submit”.
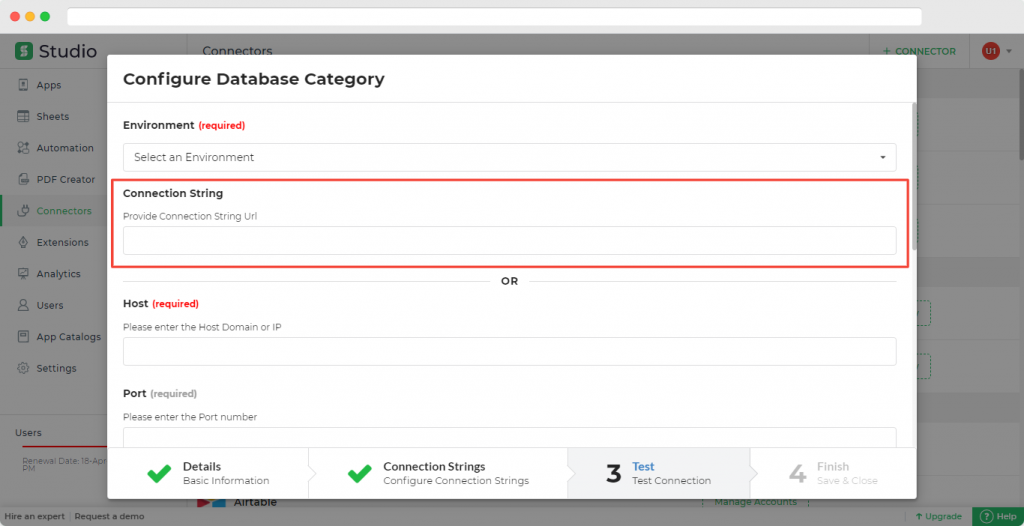
Once these configurations are done, you need to Test the request and connection. If the authentication is successful you would get the response accordingly. You can now click Continue to Finish and Save your configuration. You will notice the connector is added to the list.
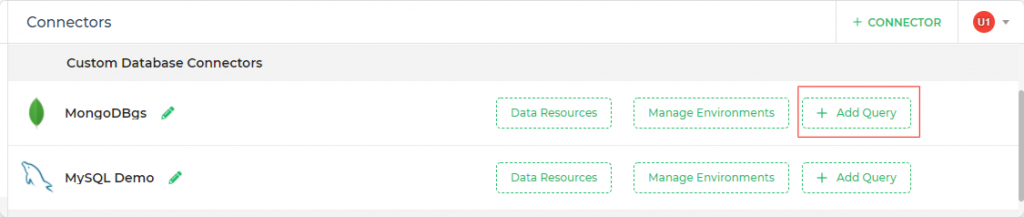
Step 4: Adding query to the database
This is an important step.
Here you configure the various actions MongoDB supports. For example, if your action is Find the parameters would be Filter, projection, sort, limit, and skip and you can use this to read the data. If you choose InsertOne as action, the parameter would change to Insert as Key: Value string that can write to the database. Once you have assigned the necessary values, you can Run the query. The response can be seen as per the parameters given.
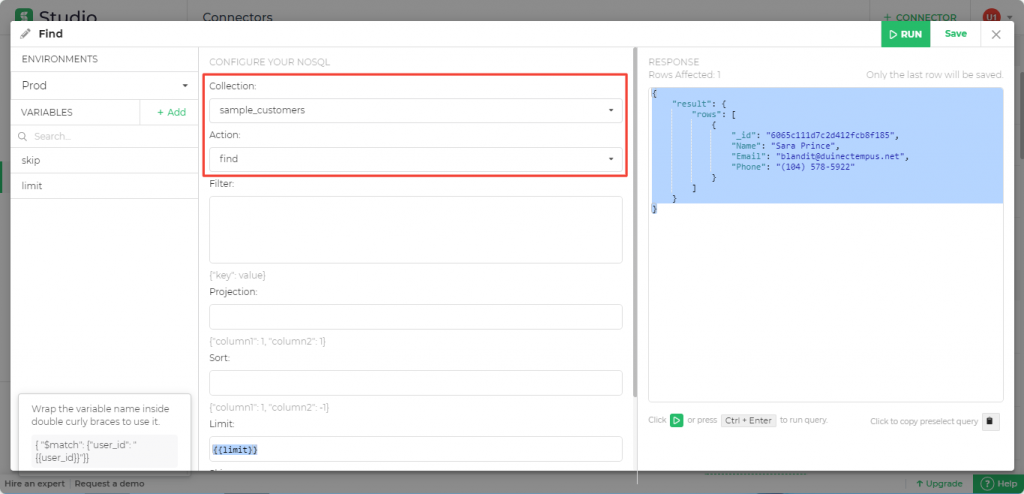
Next, you need to Enter a service name, the collection, and the action.
Let’s name it “FindData”. For our customer portal use case, I will select “Find” action. Under the Collection dropdown menu, you will be able to see the databases in your cluster. Pick the one you want to use in your app.
Here is how > https://www.youtube.com/watch?v=9JlSylCUCiY&t=78s
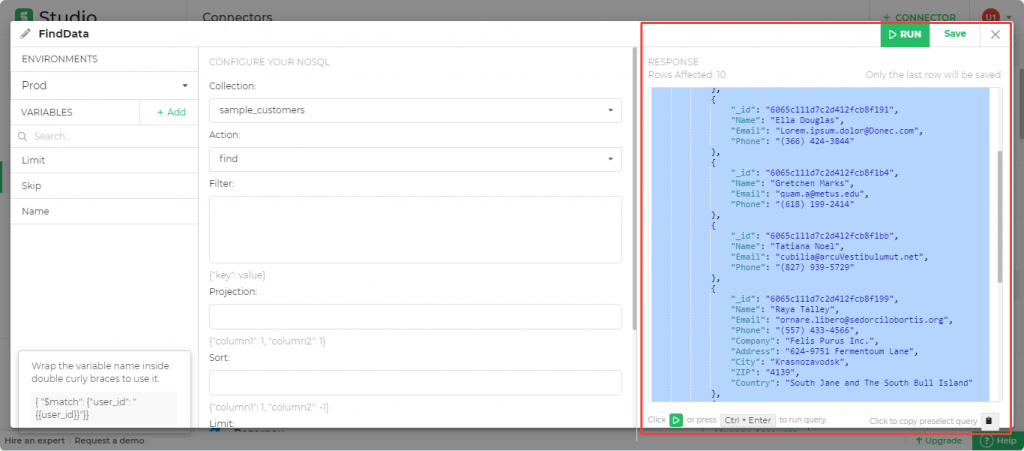
Once you are done, click on RUN on the top right corner. You will be able to see first 10 rows
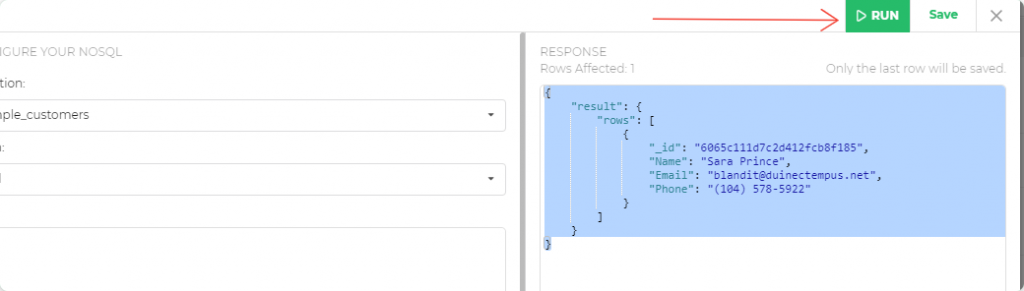
Note here, Only the last row will be saved; if the final row has Name, Email, Contact, Address, Company fields, only those will reflect in your app later.
Click on “Save” to proceed to the next step.
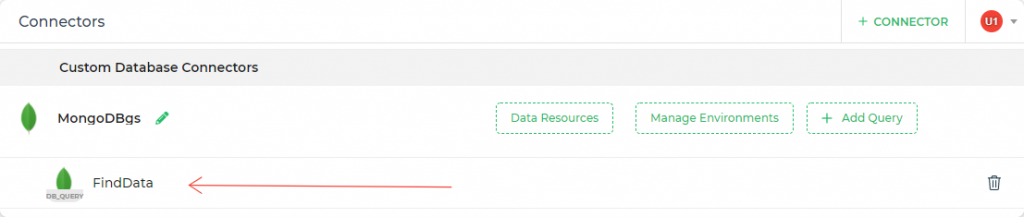
You can now view the queries that you saved for using in your apps later under your specific connector under Custom Database connectors.
2. Adding the Zendesk integration on DronaHQ
For this step, we will use the ready Zendesk Connector in DronaHQ.
Step 1: Setting up your Zendesk Account
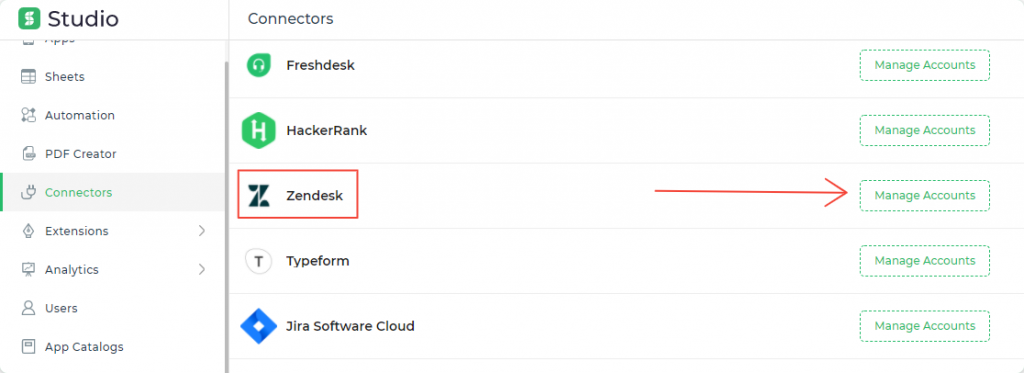
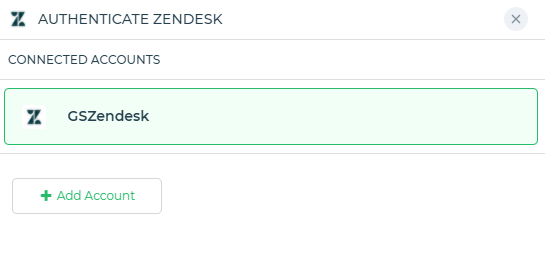
Head back to Connectors, scroll down to locate Zendesk and then click on “Manage Accounts”.
You will notice that it says “No Account is added in this Category”. Click on Add Account.
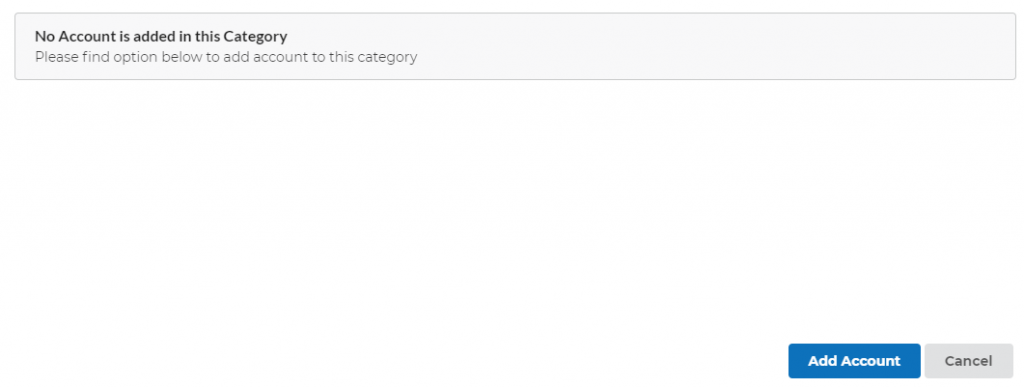
A popup will appear.
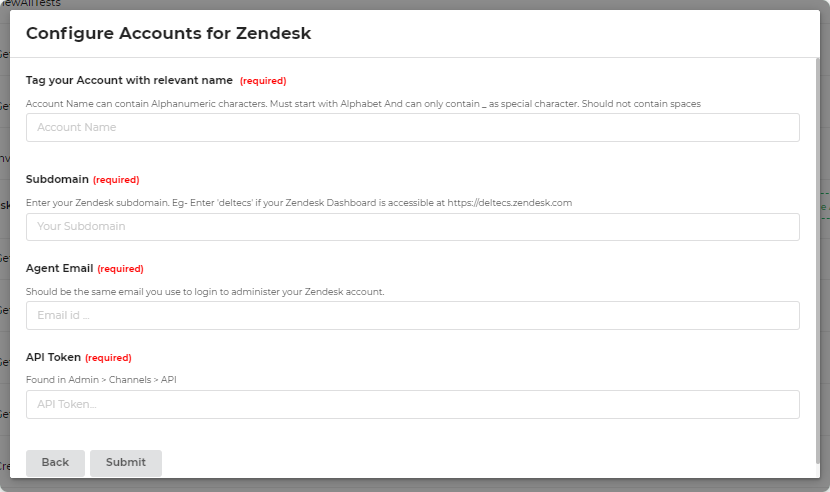
Give the account a reference name, followed by the subdomain of your Zendesk account. Enter ‘deltecs’ if your Zendesk Dashboard is accessible at https://deltecs.zendesk.com. Enter your admin login email, it should be the same you use to login to your Zendesk account.
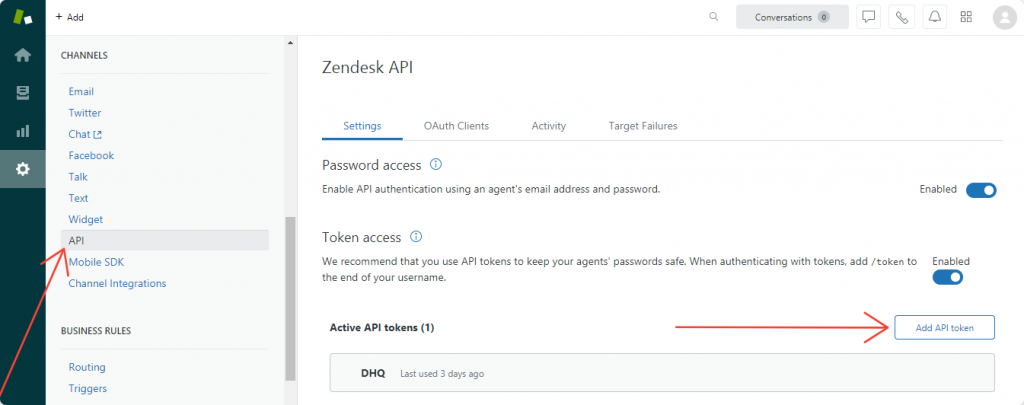
Next you need the API token. For this, head over to Admin settings, under Channel and location the API menu.
Once you have entered all the details, click on Submit.
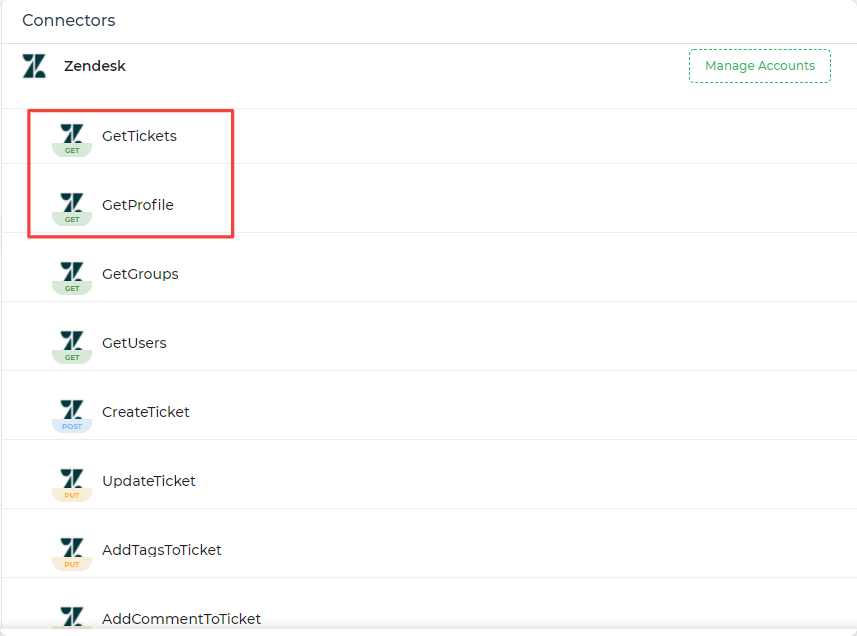
At this step you will also be presented with a list of Actions. For our use case, I want to create a list of Zendesk tickets for the end user to scan through. So I will be selecting “GetTicket” and repeating the process for “GetUsers” at a later stage in our process.
3. Building the Customer Support App
We now proceed to building the app.
Step 1: Creating the App from Scratch
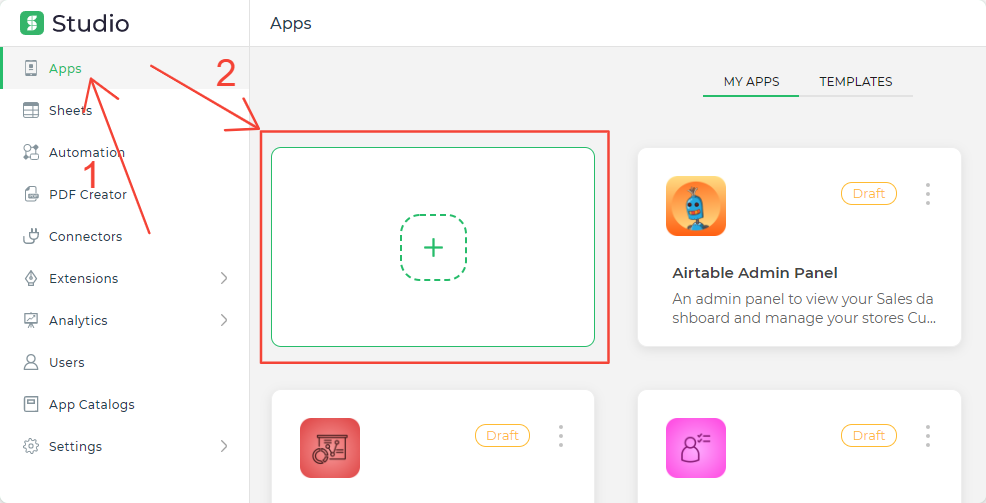
On the left menu, click on “Apps” and then click on the “ + “ sign to start building your app from scratch.
Note: At this step you are very likely to find a relevant app template (like Customer Support Tool, Sales Dashboard, Customer Feedback, Refund Tool, and so on) under the “TEMPLATES” heading, but in this article we will be making the app from scratch. If you already have an app on DronaHQ, you can use the connectors we just configured in those apps too.
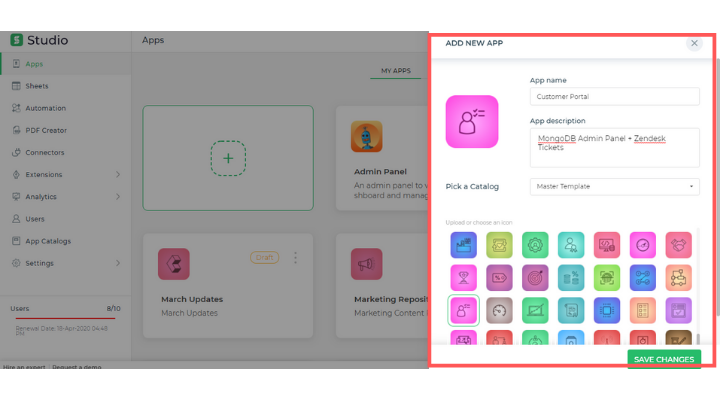
Let’s give our app a name and a description. At the time of creating I named the app Customer Portal which I later updated to Customer Support App.
Step 2: Creating the Screens/UI
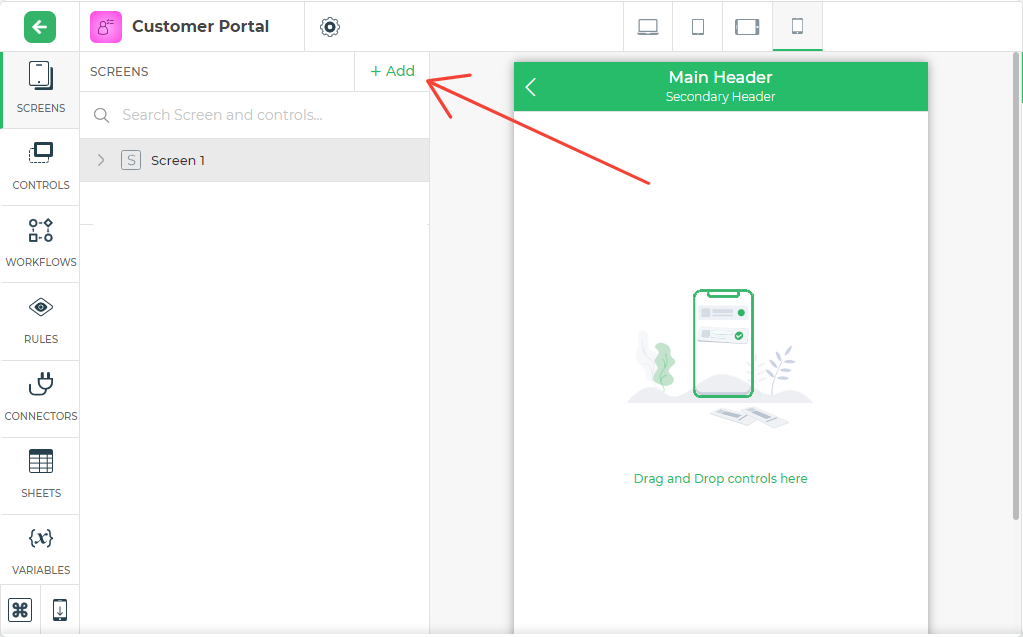
The app will open up in a new tab like in the image below.
I need to see both the Zendesk ticket list and individual customer details on the same screen.
To get that view, I can use Panels in DronaHQ to create two column views; Zendesk List on one the left and MongoDB view on the right. To make things faster, I will pick a template screen from the Screen Marketplace.
To select an app screen click on the “ + Add ”
You can browse through a list of Screens, Menus, Popups, Trays. For this app, let’s go with the Two Column with Tabs screen.
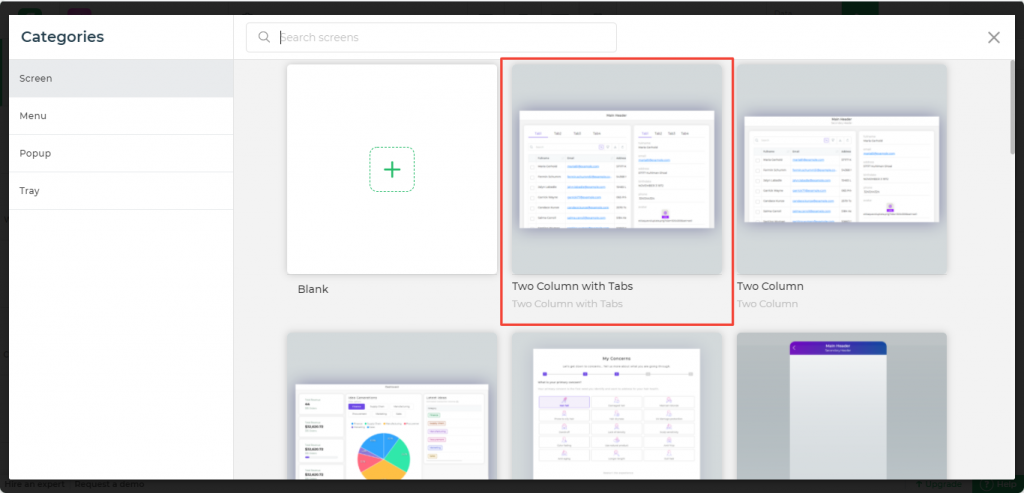
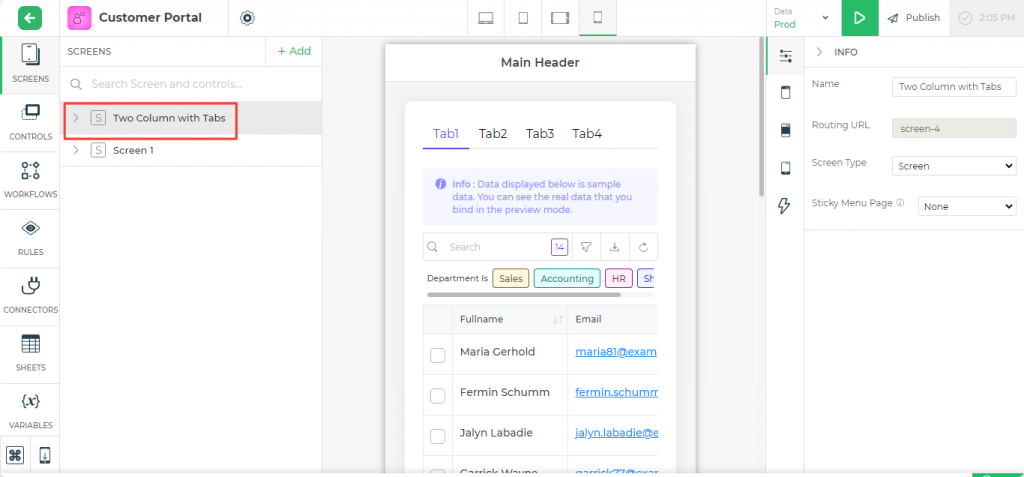
You will see the screen is added to your app:
Step 3: Using Zendesk & MongoDB connectors in App
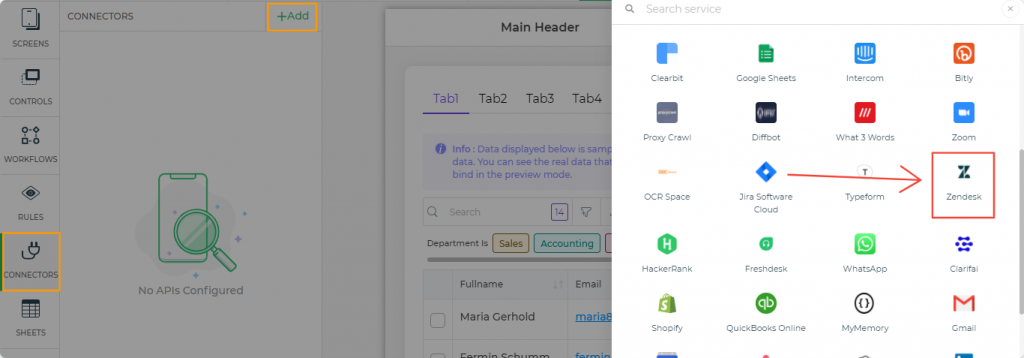
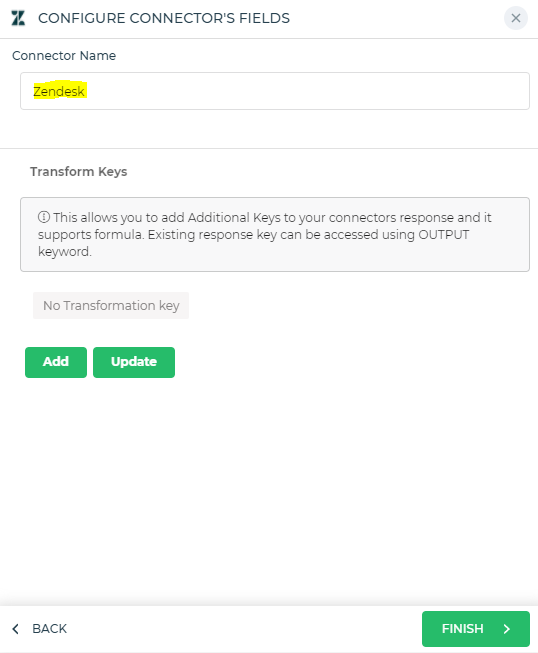
We need to be able to access the Zendesk Connector in this app. To do that, Click on the Connectors on the left panel. Then click on + Add and select Zendesk from the list on the right and click on Continue to proceed with the setup.
Since we need to get the tickets first, let’s add the GetTicket Action
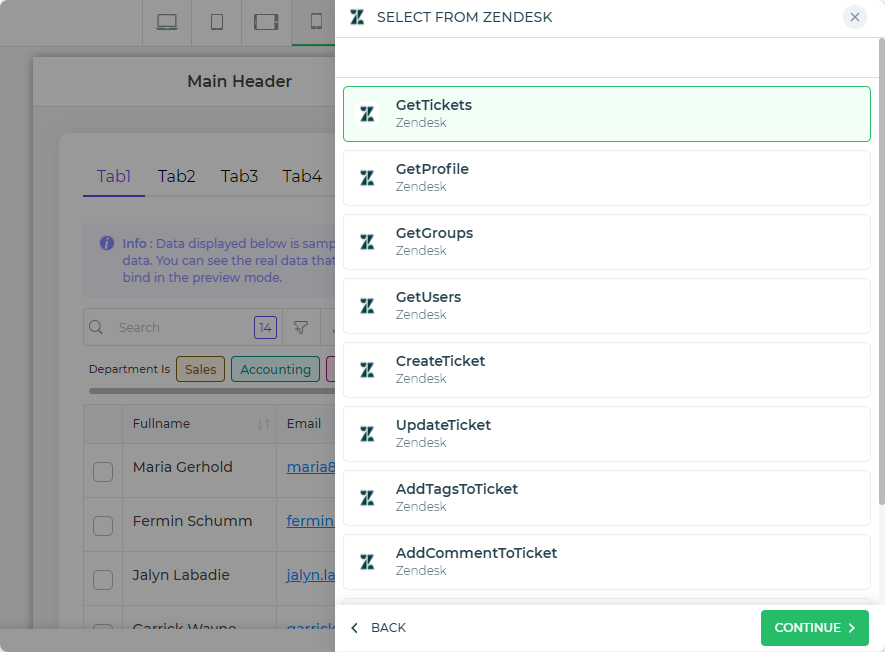
Select the account that you added in previous step and click on Continue
Give the action a name to refer it to and then click on Finish. You will be using the name given here when binding data to the Table Grid.
! Repeat the process and add the GetUsers action. We need this to be able to map our customers on Zendesk to those in MongoDB using the email IDs.
Next we need to repeat the process to add our MongoDB connector. Click on +Add again, then scroll to the “CUSTOM DATABASE CONNECTOR” and select MongoDB connector.

You will be asked to select the Action that was set up while configuring the database connector. Select the “FindData” task was created and click on Continue to select the environment.
Once you have selected the environment (I selected Prod), then proceeded to enter the name for the connector to be used in the app. Enter the name and click on Finish.

Step 4: Binding data from Zendesk
We need a table that lists all my Zendesk Tickets. For this, I can use the table grid control.
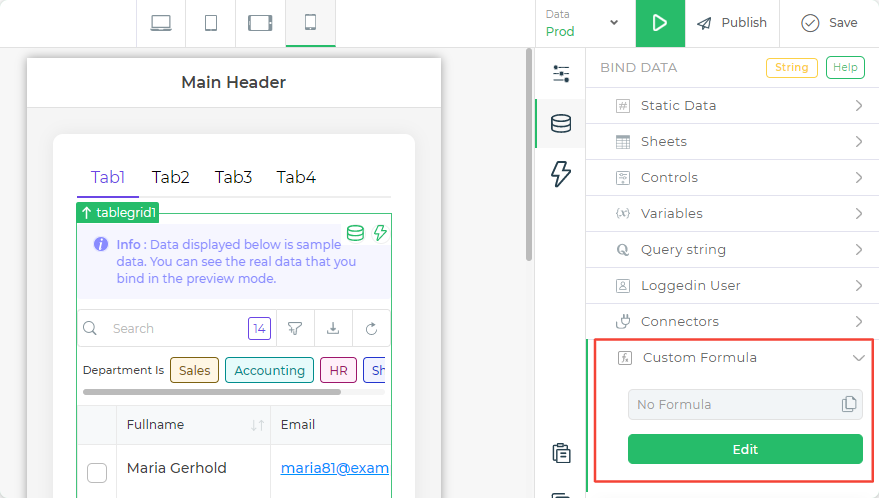
To do that, we click on the Table Grid Control, then click on the database icon as shown below in the image

This will pop open a menu on the right of the screen that displays the various methods using which you can bind your data to the Table Grid control.
On the right hand side, select the Connector option, then click on the dropdown menu and you can see the connects we added in step 3.
It should be noted that we now have two Zendesk actions that we need to use in our app. For this, we will have to use the Custom Formula.
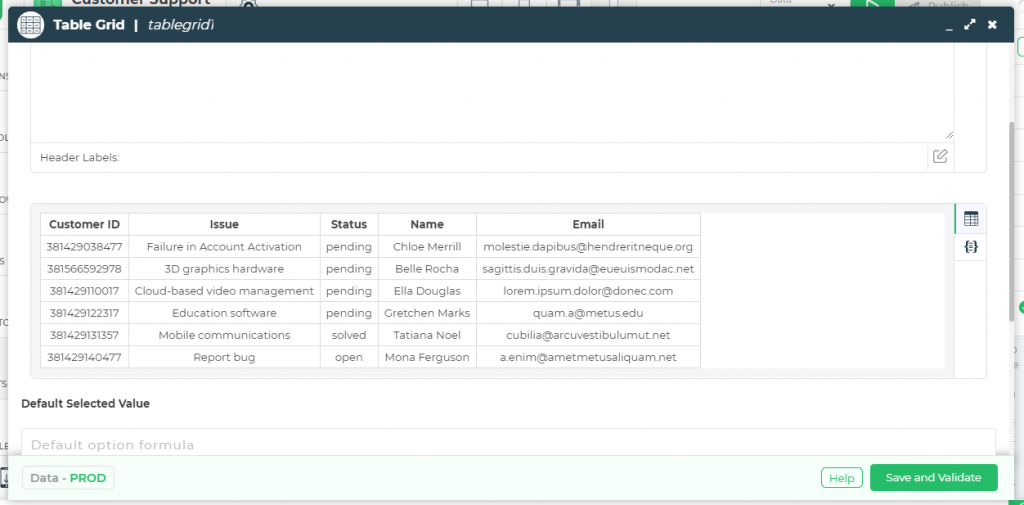
Click on edit to use enter the formula.
> Creating a Custom Formula – Binding data from two data sources
From the GetTicket action we need the ticket subject (subject), the zendesk requester ID of the person who initiated the ticket (requesterID), and the status (ticket status).
From the GetUser action, we get the Zendesk user ID (which is the same as the requester ID in GetTicket), the Email ID of the user and the Name of the user.
We will use a custom formula to derive the values from the two actions and present it in the table. We want to combine the output of the two actions by one common data point that is the members ID, which is the requester ID in gettickets and the user ID in getusers.
When you are binding data from Connectors, it underlying gets converted into BINDAPI function.
Connectors. You can then restructure the output keys using MAPKEYS and then follow the same process for another connector. You can then use any of the JOINs functions – LEFTJOIN, RIGHTJOIN, INNERJOIN, FULLJOIN as per your need to merge the 2 connectors and bind the data accordingly. Follow along the links to fully understand how the JOIN functions work.
Please note – in the above JOINs function example, instead of LOOKUP you can use BINDAPI instead when binding from connectors.
For Example – Using the INNERJOIN function on common key – members id:
INNERJOIN( MAPKEYS( BINDAPI( [Connector1.members.id,Connector1.members.name]),“id1:members.id,Name:members.name”),MAPKEYS(BINDAPI( [Connector2.members.id,Connector2.members.is_admin]),“id2:members.id,isAdmin:members.is_admin”),“id1”,“id2”)
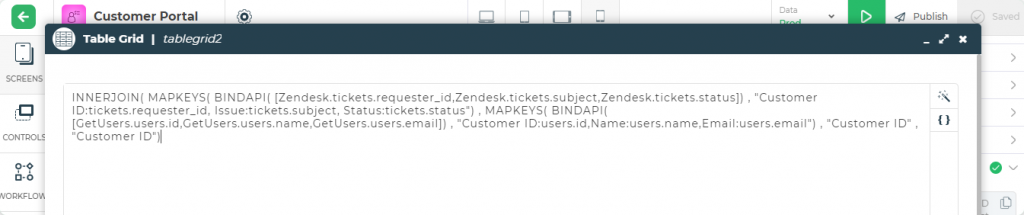
For our use case, the formula becomes:
INNERJOIN( MAPKEYS( BINDAPI( [Zendesk.tickets.requester_id,Zendesk.tickets.subject,Zendesk.tickets.status]) , “Customer ID:tickets.requester_id, Issue:tickets.subject, Status:tickets.status”) , MAPKEYS( BINDAPI( [GetUsers.users.id,GetUsers.users.name,GetUsers.users.email]) , “Customer ID:users.id,Name:users.name,Email:users.email”) , “Customer ID” , “Customer ID”)
If you are using different control and connector names, You can start typing the formula in the wizard and DronaHQ will autocomplete it for you with suggestions on which component to add next.
Click on Save and Validate. It will preview the data that will go into your Table Grid.
Step 5: Binding data from MongoDB
For every ticket that gets listed in the Table Grid, for this app we need to fetch and display the customer details.
For the same, let’s use the Detail View control. Since we used a screen template, it already has a detail view control added to the screen. If you are building one from scratch, head out of the formula wizard, click on Controls on the left, then type Detail View into the search box and add it to your screen.
Click on the Database icon and head over to add the Custom Function. (We are using custom function as the output is dependent on the selected row in our Zendesk Table Grid)

Note: For simplicity, you can add the Connector and the data points directly and then head over to the the Custom Formula to add the filter (to read value where email id in mongodb is equal to selected zendesk email id)
Here is what the formula should look like:
BINDAPI( [MongoDB.result.rows.Name,MongoDB.result.rows.Email,MongoDB.result.rows.Phone,MongoDB.result.rows.Company,MongoDB.result.rows.Address,MongoDB.result.rows.City,MongoDB.result.rows.ZIP,MongoDB.result.rows.Country],MongoDB.result.rows.Email=tablegrid1.Email)
Note: You can change the column labels in both the Detail View control as well as the Table Grid control.
Save and Validate will not show any data as the output is dependent on another value.
Step 6: Preview the App
We can now preview our progress. To do that, click on the green play button on top right corner.
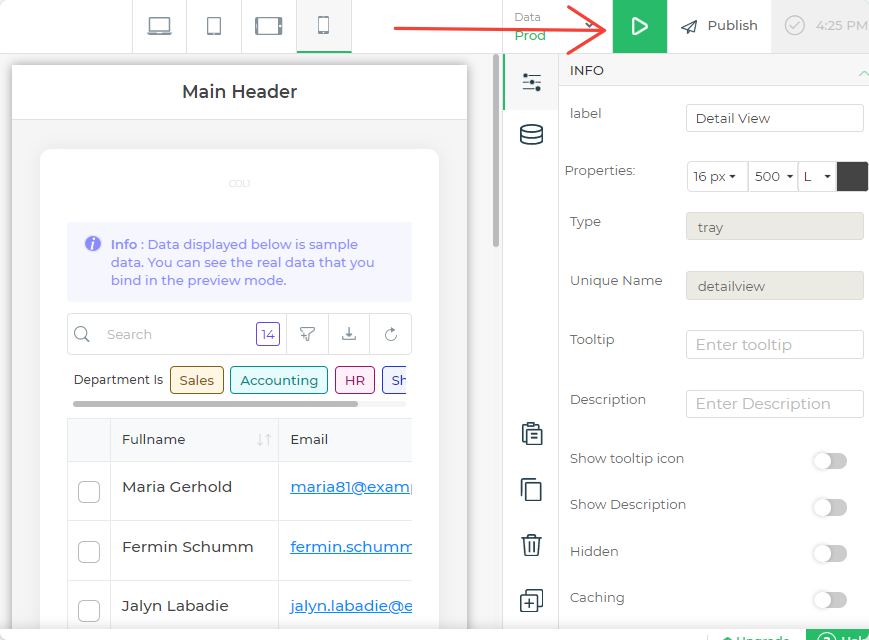
This will open up a preview version of your app where you can test if your logic worked or not.
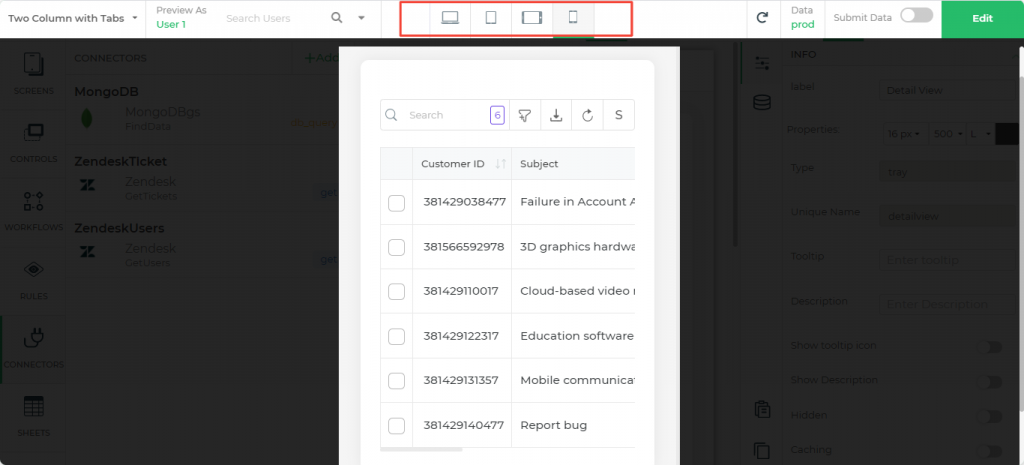
Let’s switch the view from mobile to desktop.
As you can see, when I click on an item in the table grid, the detail view on the right fetches more detail about the custom and displays it on the screen.
This brings us to the end of part 1 of the app building process. In part 2, I will be adding features for the CSR to be able to send emails through Gmail or SendGrid and initiate refunds through Stripe in addition to enhancing the UI of the app by adding labels, using tabs, and more detail views.
Let me know what would you like me to cover in this tutorial next. Email me or message me on Twitter or Linkedin.
Related Articles