Integrating Airtable with DronaHQ
Airtable is a spreadsheet-database hybrid, with the features of a database but the power of a spreadsheet. DronaHQ Studio provides integration with Airtable that allows you to manage the Airtable tables and keep track of anything and everything.
You can make use of the Airtable Integration for a host of areas like Marketing campaign planning, Design project tracking, team collaboration contributing to Knowledge Base, and many more.
Note: It is important to note that Airtable has paused granting access to their metadata API. While waiting for access, this integration requires a couple of manual steps.
Configuring Airtable connector
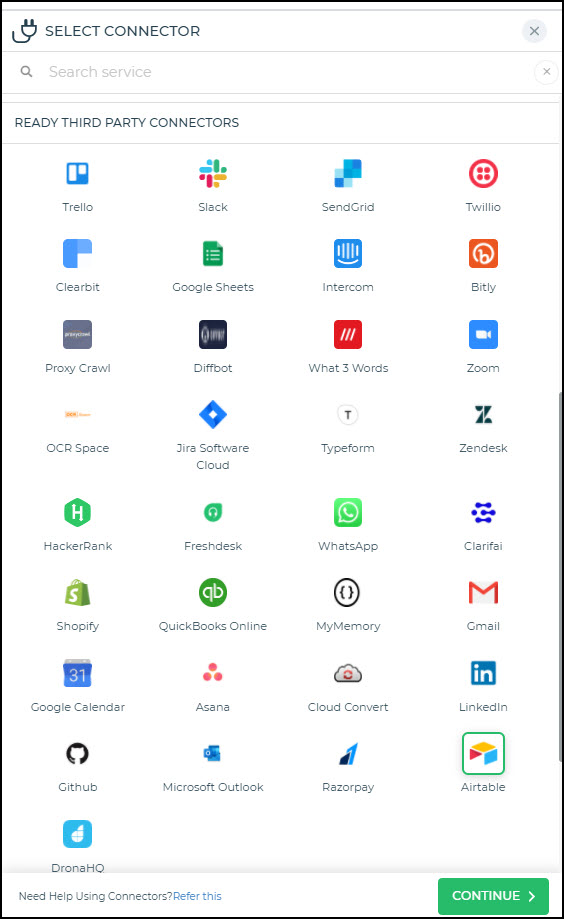
The Airtable Third Party connector is available under Connectors.
- To add the connector, select Airtable and click Continue.

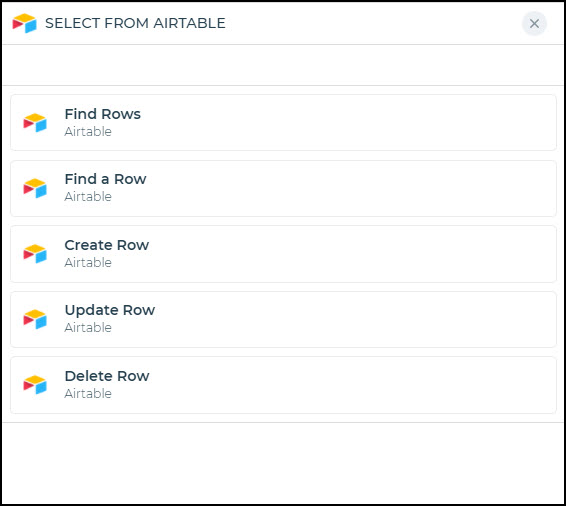
- Select the Action you want to carry out under Select from Airtable and click Continue.

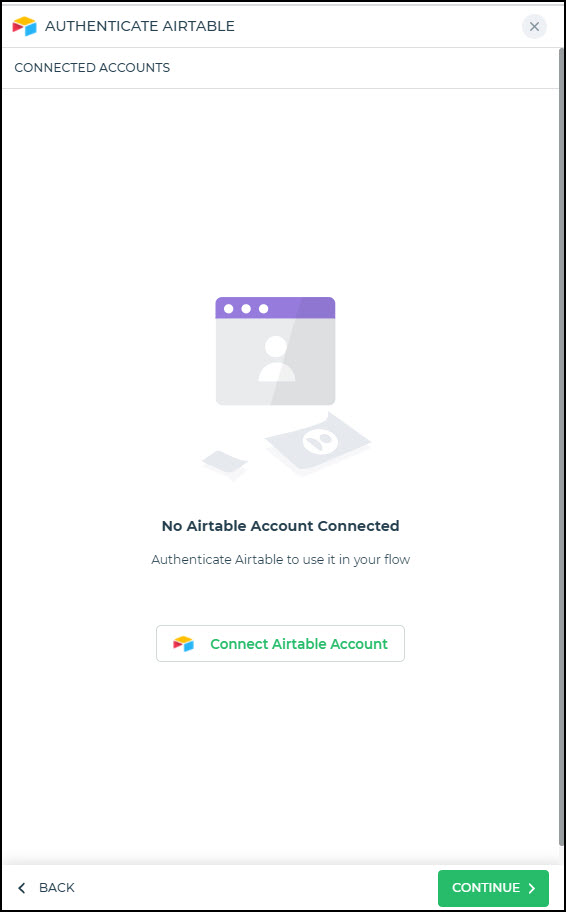
- Now you need to add the Airtable Account to authenticate Airtable. For this, you need to first configure the account and then proceed. To configure the Airtable account, under Authenticate Airtable, click +Add Account. If you have already configured your account, you simply need to choose it from the list and click Continue.

- Now Configure connector fields. Add a Connector name. Then add the respective Fields for the connector account.
- Once all details are added, click Finish. Your connector configuration is now done.
Using Airtable connector
Now let us consider a few scenarios to understand some of the functionalities available with this integration. Let us take the example to add the Airtable connector in an Action flow. The connection and authentication process would be the same whether you use an action flow or workflow.
- To add a connector in an action flow, go to the Action flow and under Server-side actions > Ready Third-party connectors, select the Airtable connector.
- Under Select from Airtable, select specific Action and click Continue.
- Add the authenticated account and click Continue.
Note: In case you make any changes to the Airtable table name or even the Base, you should reconfigure your connector so that it is updated with the current data.
Create a row
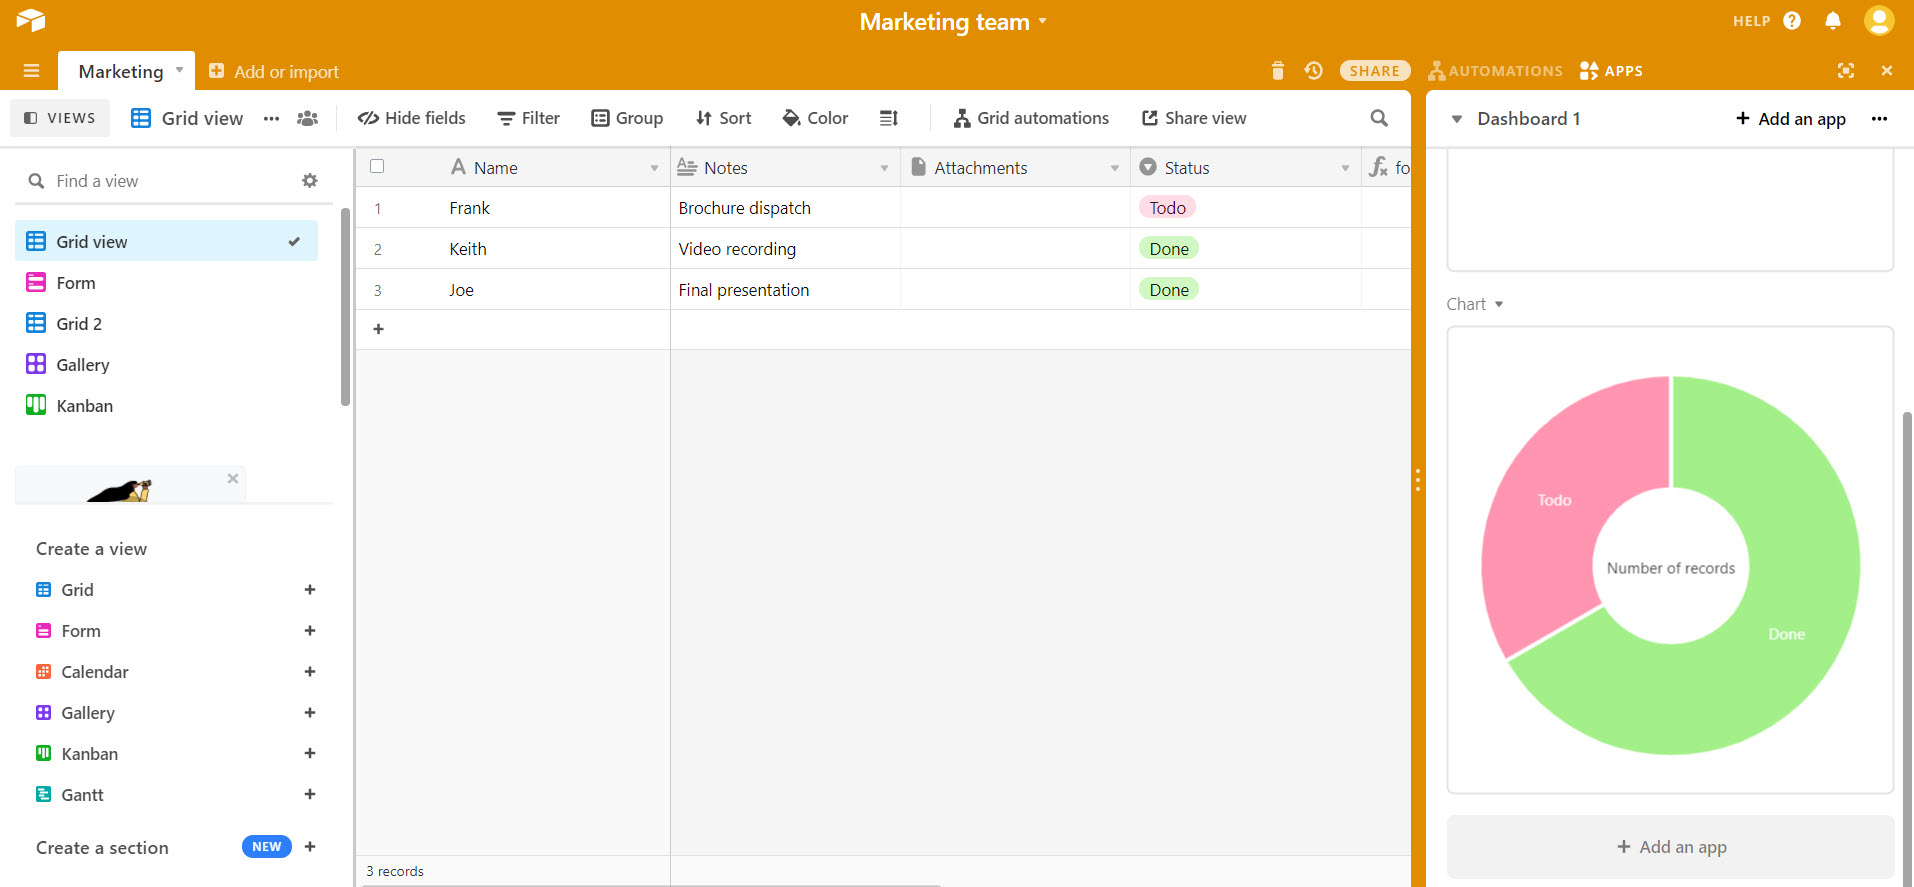
The integration with Airtable enables you to add a new record to the Airtable table. For the sake of an example, let us add a new record to the Airtable table “Marketing” under the Marketing team base created here.
Let us for this example add Static values. You can also make use of Keywords to add the dynamic values as well, on form submission or on an action event. In this example, let us add the new row on click of the Action button to Add record.
A few things to remember when adding a new row using this connector:
- It supports simple key values, nested keys like those for the Attachment column type are not supported. To enable adding new records, such columns should be kept empty or you can create a custom function to prepare data in the expected format.
- If you have a formula column, that should also be kept empty.
- You can create custom functions to insert columns that have nested key values.
Find row/rows
There would be times when you would want to search a record as a part of your update or delete row action. Typically you search the row or rows matching criteria and fetch their record-id which would then be used to specify the record to be updated or deleted.
- To find a row/rows, select the appropriate connector as required.
- Select the connected Airtable account and click Continue.
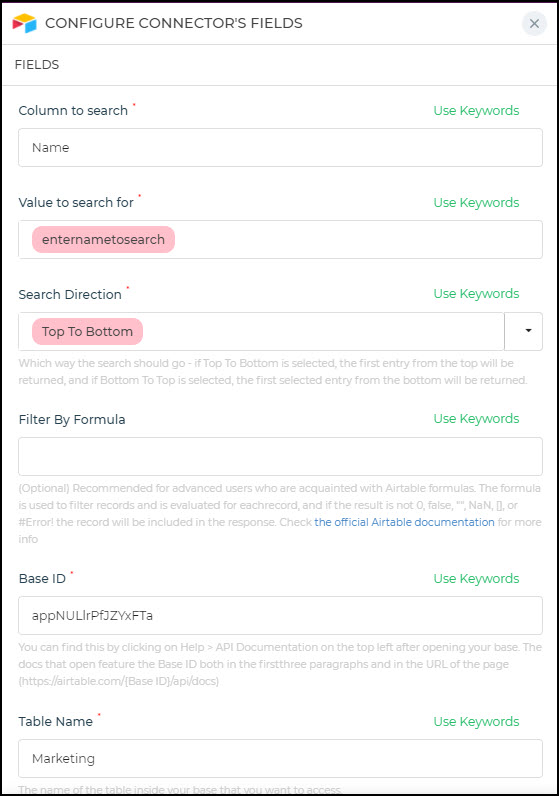
- Column to search: This is the column from the Table to be searched. You can type the name or use a keyword.
- Value to search: This is the Value to be searched in the specified column. Can also be a dynamic value
- Search Direction: Search the table from top to bottom or from the bottom to the top.
- Filter by Formula: Airtable formula to be added to filter data. Typically useful for advanced users. You can find detailed documentation for supported formulas here.
- Base ID: Base ID is the ID for the respective Base you are using in Airtable. The ID is available in the Help > API Documentation of your Airtable base. You can copy it from the documentation and paste it here.
- Table name: This is the table name from the specified Base.
- Transform keys: You can add transformation of the key values of your connector. Say for example you want to add certain keys by modifying the connector response then you can use the Column transformation.

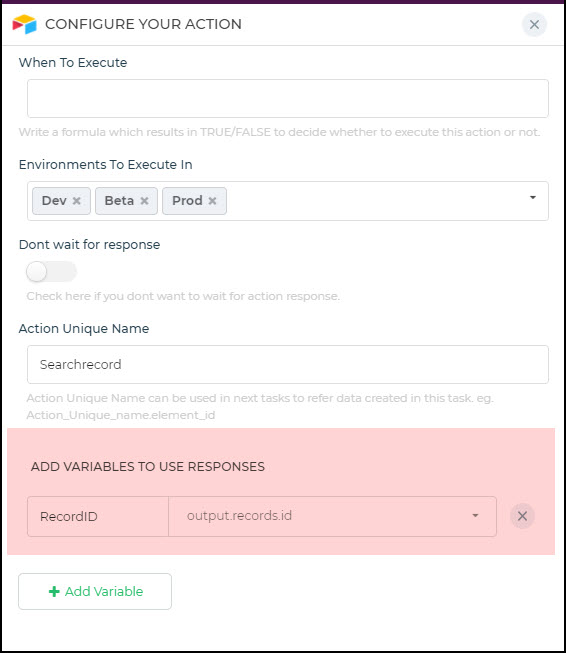
- After the necessary fields are added, enter the Action unique name and also make sure that you add Variable to return values. The single or multiple values for the record id would be available as “output.records.id” depending upon the action used; find the row or find rows. This response can then be used in other connectors.

The Airtable API returns only those keys of the row in the API response whose value is present whereas Studio expects uniform/consistent keys present in the API response to be able to work on those keys. So you can either make sure all the cells in Airtable are filled which you want to display or you can write a custom javascript function that can give a consistent output.
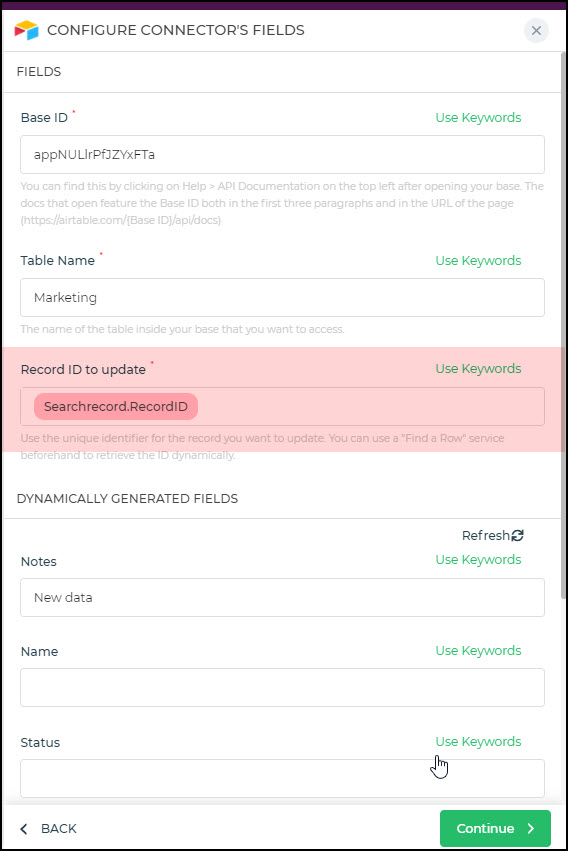
Update Rows
Now let us consider an example to update an existing row. When updating records you would first need to use the Find Row / Rows function to find the record-id of the row to be updated. This value returned would then be used to update the rows for the specific record-id.
- To update a row, under Select from Airtable, first, select Find a row / Find rows as seen earlier.
- Now to update the rows, from the Server-side action > Airtable connector, select the Update row action and add the authenticated account.
- Add the Base Id and the Table name. Now using the keywords, add the search record id that was returned by the Find row/ rows.
- Once you add the table name the columns in the table would be listed out. You can then enter the static values or the dynamic values using the Keywords for only those columns that you want to update. Leave the other columns blank so that they would be left with the existing values.
- Add action unique name and click Finish.

- Now if you want to update multiple rows that you had searched and fetched in the Find rows action earlier, then you need to iterate the rows option in the Update Rows API.
- Now, whenever you initiate the action the column where you added the data would be updated.
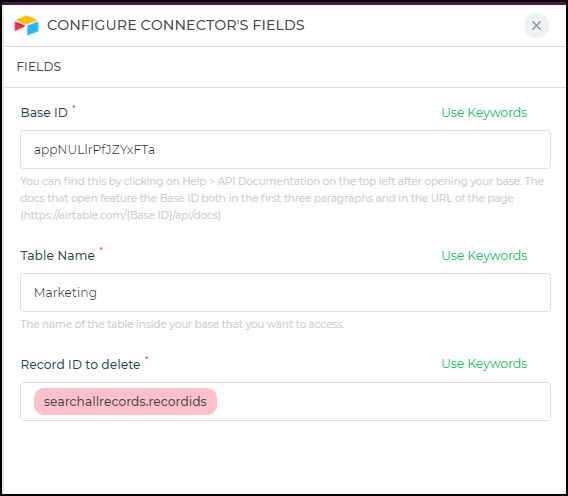
Delete rows
- To delete a row, under Select from Airtable, first, select Find a row / Find rows as seen earlier.
- Now to delete the row/s, from the Server-side action > Airtable connector, select the Delete row action and add the authenticated account.
- Add the Base Id and the Table name. Now using the keywords, add the search record id that was returned by the Find row/ rows. Click Continue.

- Add the Action unique name and conditions for execution if any. Click Finish. Now whenever you trigger the action flow, the matching record as per the given condition would be deleted.
- Now if you want to delete multiple rows that you had searched and fetched in the Find rows action earlier, then you need to iterate rows option in the Delete Rows API.
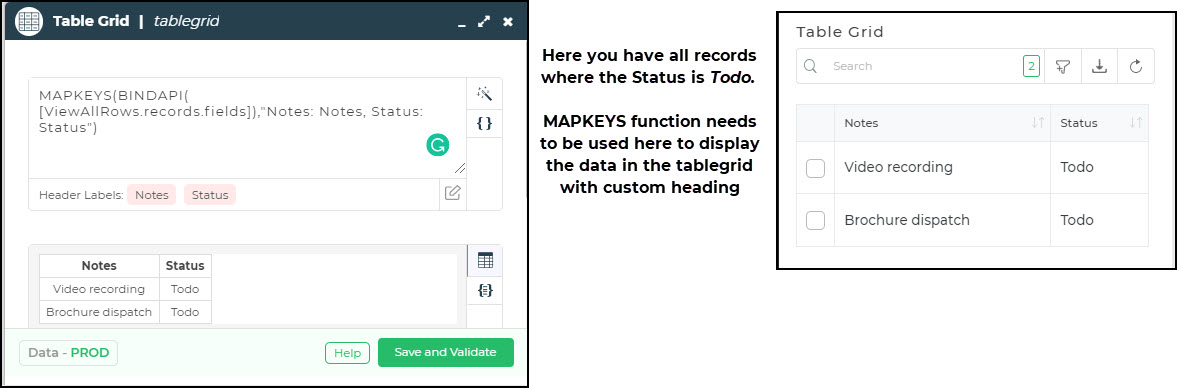
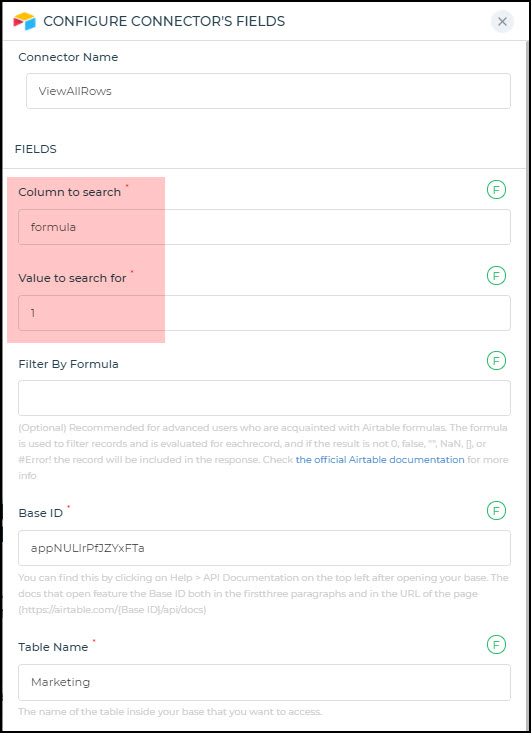
Viewing Airtable data
You can make use of the controls like the table grid control to view the data from Airtable tables. There is no direct API that can allow you to view all rows. You would have to configure an Airtable connector to ViewAll Rows. Add the Column to Search and the Value to search for according to the data you want to fetch.
Now if you want to fetch all rows where the Status is Todo, you need to provide the Column to Search as Status and Value to search for as Todo. Here all rows matching the search condition would be fetched.
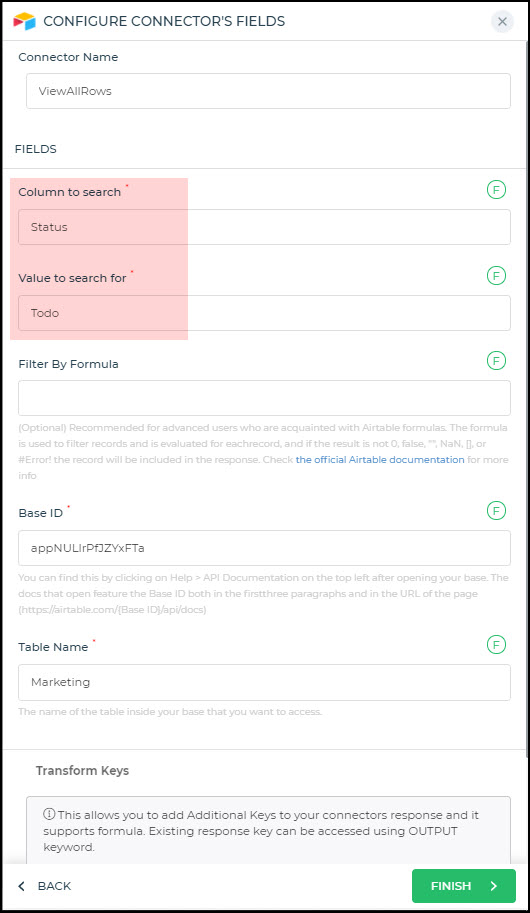
You can then use the functions as shown in the example below.
However, now in case you want to display all the rows from the Airtable table, then, in that case, you would need to have a column that has the common value so that you can provide the Column to search with a single common value. For example, you may use a formula column that can have a common value. You can then add that as a Column to search and Value to Search for and then configure the connector accordingly.

.
Configuring Airtable Account
Now when you are adding a new account you need to use your Airtable account authentication method. Airtable has a simple token-based authentication. You can find all your account details on the Airtable account page. When configuring the Airtable connector following are the details that you would need.
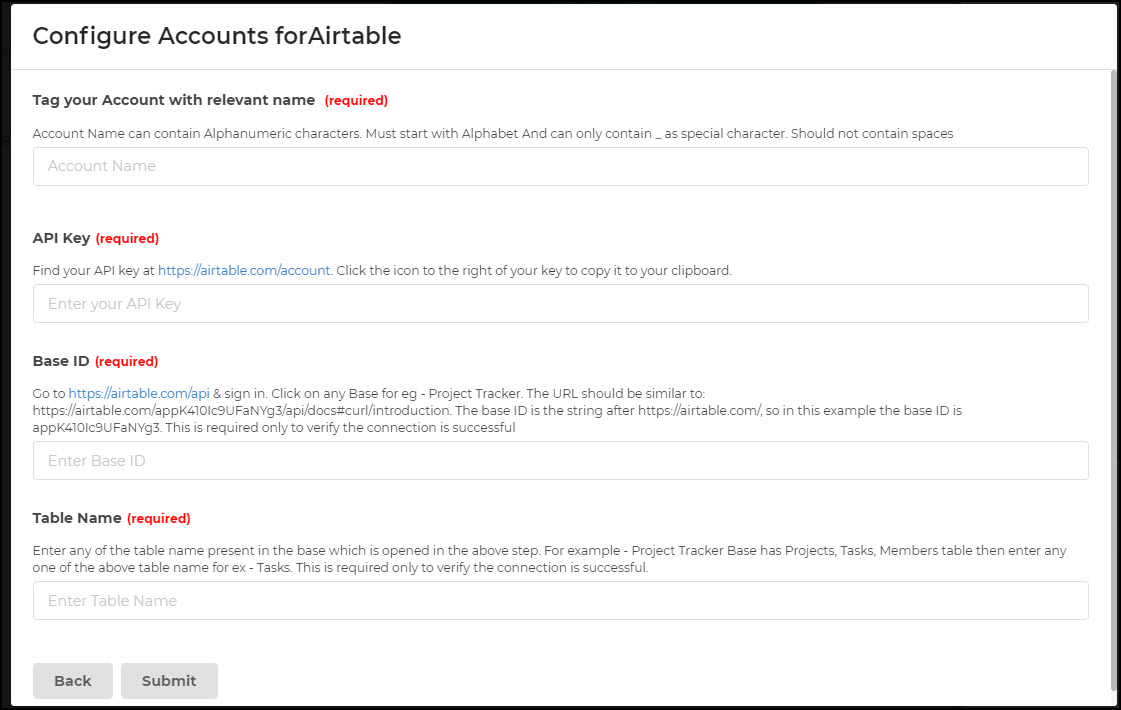
- Add a Tag for your account name. This will be the name that would be shown in the list of accounts.
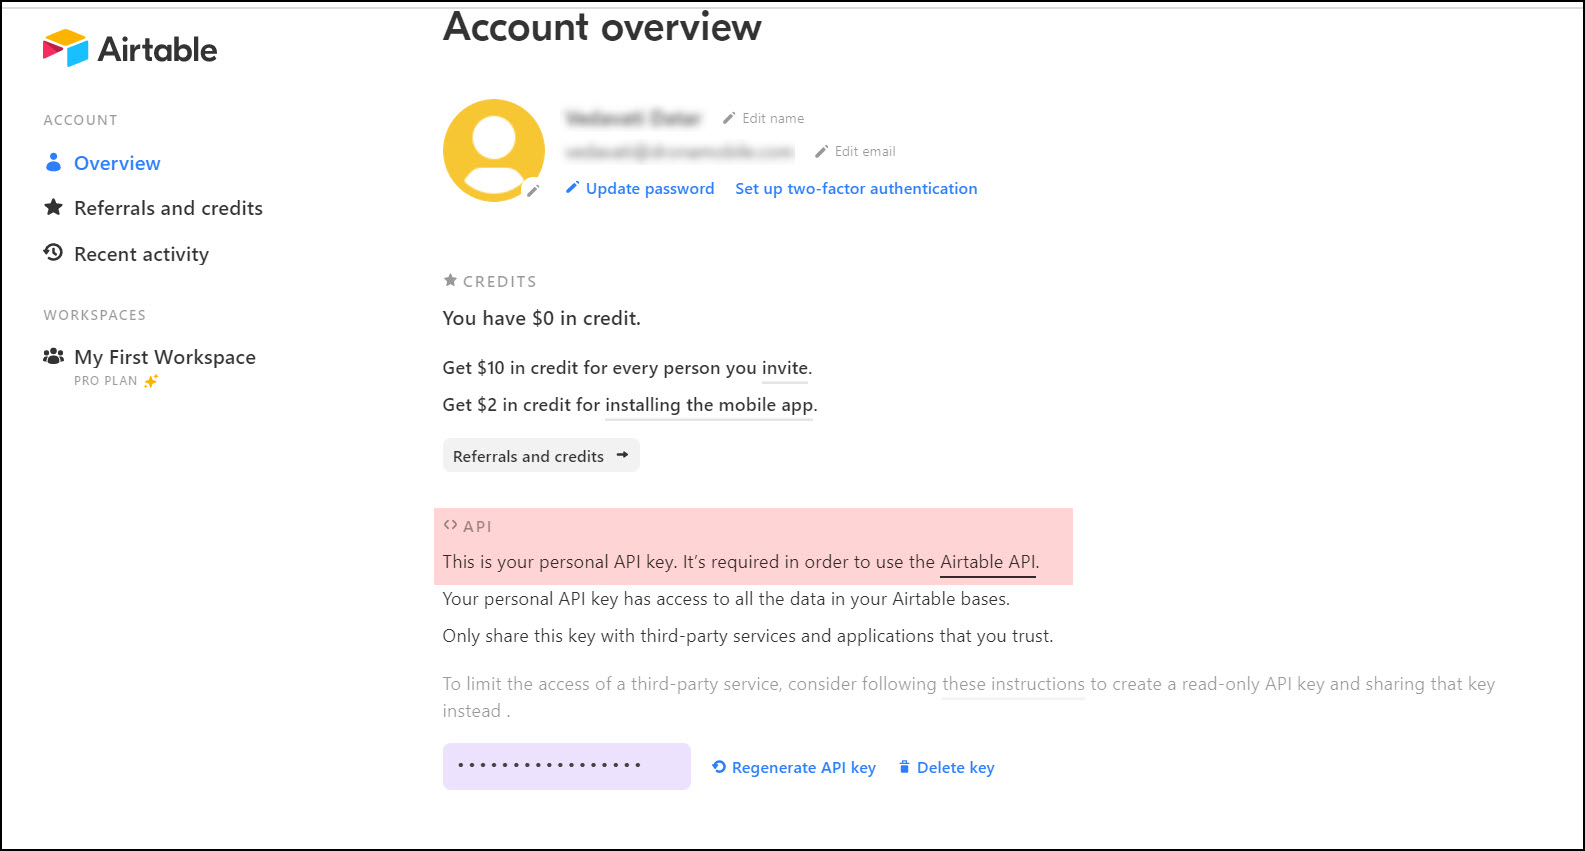
- Then add an API Key. You can find your API key on your Airtable account page under Account overview. Click and copy the key to the API Key field.

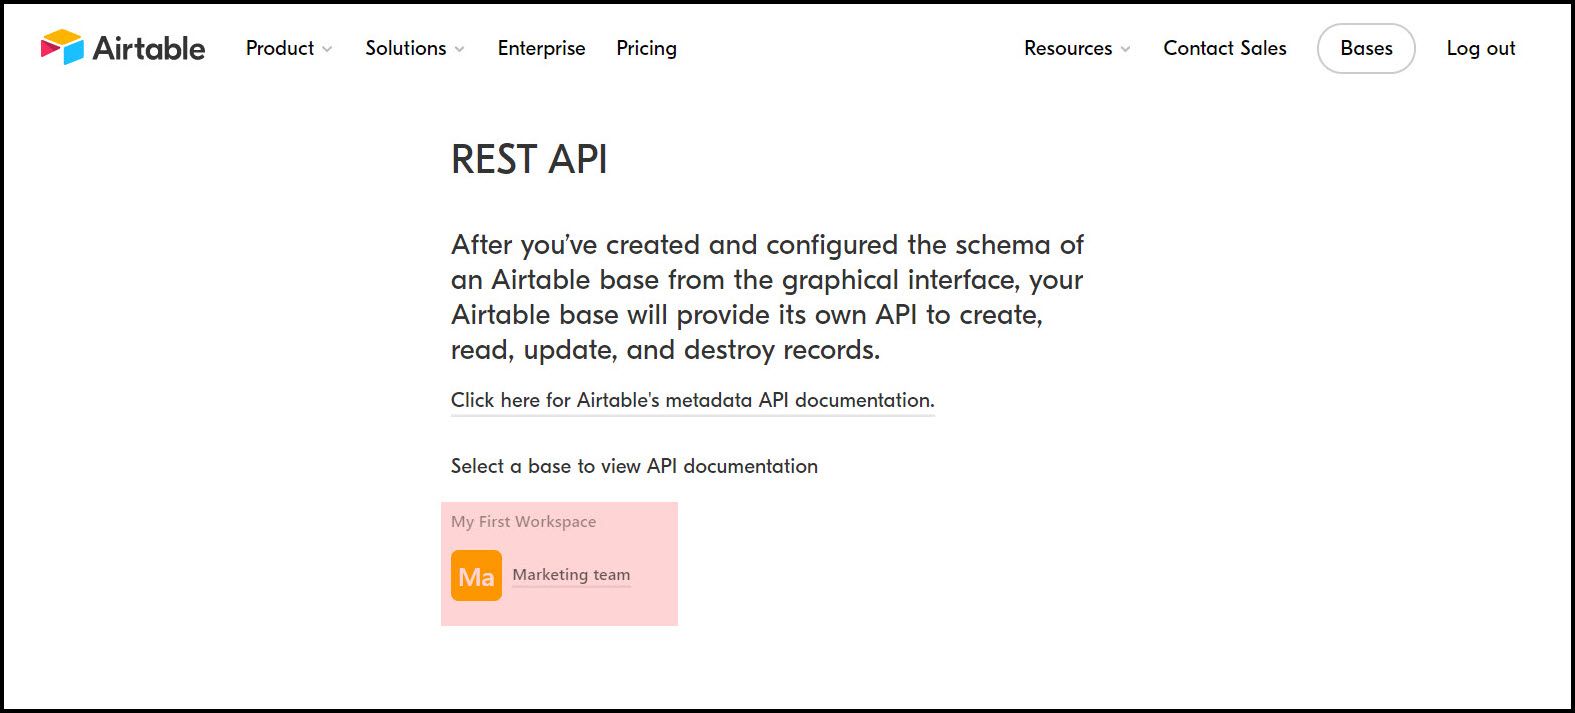
- Add the Base ID. To find your Airtable Base ID, open the Airtable API page and click the base that you want to use.
 You will find the ID of your base in the Introduction section.
 Copy and paste the Base ID to configure your account in the Connector. Now to extract data you need to provide the specific table name from your Airtable Base. Make sure that you type it as it is in the Airtable Base.
 You will find the ID of your base in the Introduction section.
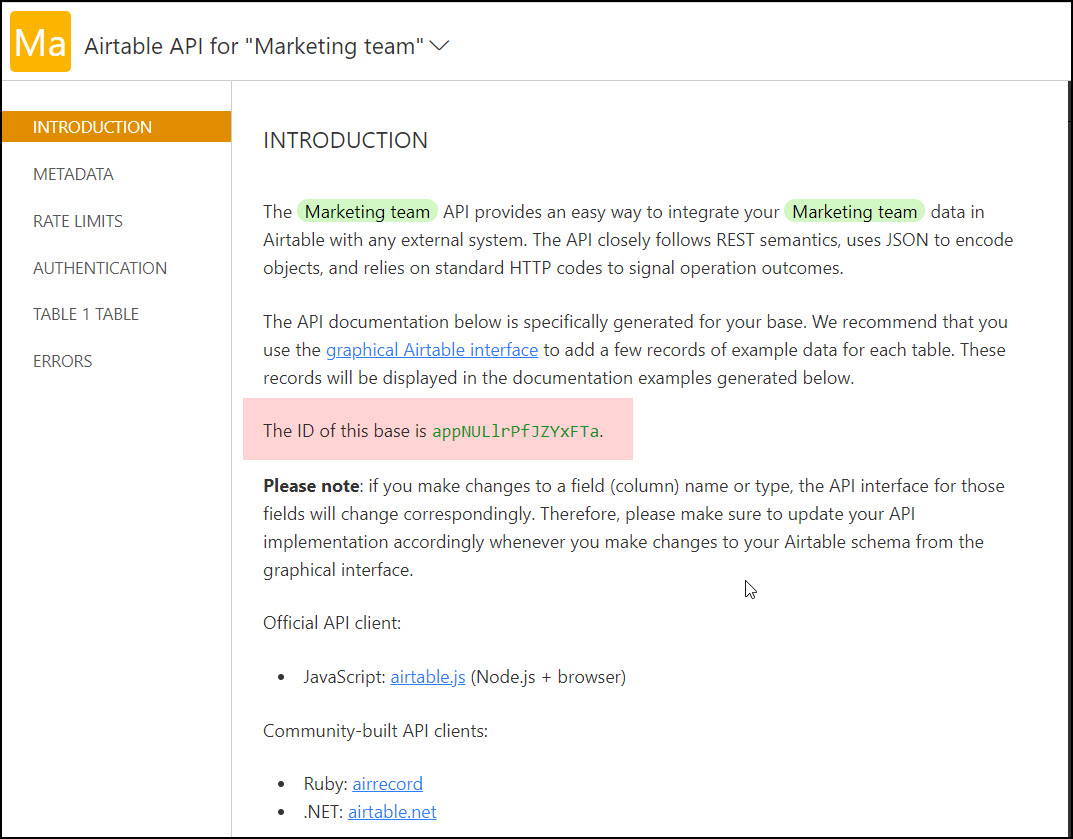 Copy and paste the Base ID to configure your account in the Connector. Now to extract data you need to provide the specific table name from your Airtable Base. Make sure that you type it as it is in the Airtable Base.
Once all the above details are added, click Submit. If all details are added, your connector’s account configuration is done. Now when you add any action you can use the account from the configured account listed out.
Related Articles